I've been making and framing enough tiny little paintings recently that I think I have the process down. So here it is!
These are my materials. Be sure to use a strong hole-punch with a spike instead of the little cookie-cutter ones, and I happen to be using fancy antique-looking brads, but any will do as long as the top is larger than the hole you punch.
The little frames I've been collecting from all over the place. This is an inexpensive resin frame from Michael's craft store.
 |
| The gaudier the better. |
As you can see, it comes with a piece of unflattering, wrinkly, pre-scratched piece of plastic instead of glass. This is terrible and you should cut it out carefully.
Much better. We'll talk about protecting your painting later. For now, punch the holes for your hanging wire.
I punch the hole closest to the hinged side of the backing first, since it's more difficult to reach. Then I measure the distance of that hole from the edge of the frame and match it on the other side.
I've found that the backs of these cheaper frame tend to be glued on crooked, so there's the possibility of your stand overlapping the bottom of your frame and sticking out if you were to hang it on a wall. Using your knife and a ruler to trim it just short of the edge should do the trick. If you feel like it, you can also paint the cut edge black.
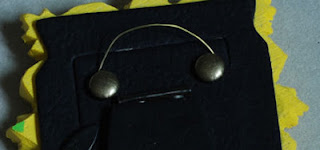
Next, slip your brads into the punched holes.
Depending on how little space you have, you may need to trim the points with your wire-cutters.
Because this is so small and light, I use basic florist's or jewellery wire for the back. Wrapping it around each brad twice, cutting the ends, and using my pliers to tuck them snugly out of sight.
The frame is now ready for art!
I use the paper insert the comes with the frame to measure the size of my picture. Take a look at how much the frame will overlap your paper, and be careful not to put anything important near the edges.
 |
| Blinding colours are not optional. |
If you've painted over your measurement lines like I usually do, just err on the side of cutting it too large and snip little pieces away until it fits.
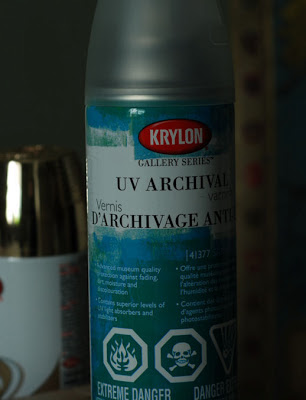
In place of glass, I've been using this archival UV protective varnish in satin finish. It gives the pieces a nice lustre, doesn't interfere with things like fluorescent colours or metallics, and I've been taking advantage of it to work in a lot of nice textures.
If you use this or a similar spray, please heed the warnings about inhalation. I took "well ventilated area" to mean that spraying it at my desk with the window open would be all right, but even an accidental lungful had me dealing with nausea into the next day. Do your coating outdoors and wear protection over your nose and mouth. Seriously.
At any rate, I usually like to go with three coats and leave it overnight before framing it.
Assemble your pieces and you have a tiny piece of art for your shelf or wall!


No comments:
Post a Comment